Fixing SilverFast 9 results not matching prescan colors
Explanation
I recently picked up an Epson Perfection V800 scanner to scan my medium format negatives. With it came a copy of SilverFast, which converts the negatives into positives. Its NegaFix tool does a pretty good job getting rid of the orange color cast and getting the “tonez” how I like them. The prescan preview makes color adjustments quick and easy.
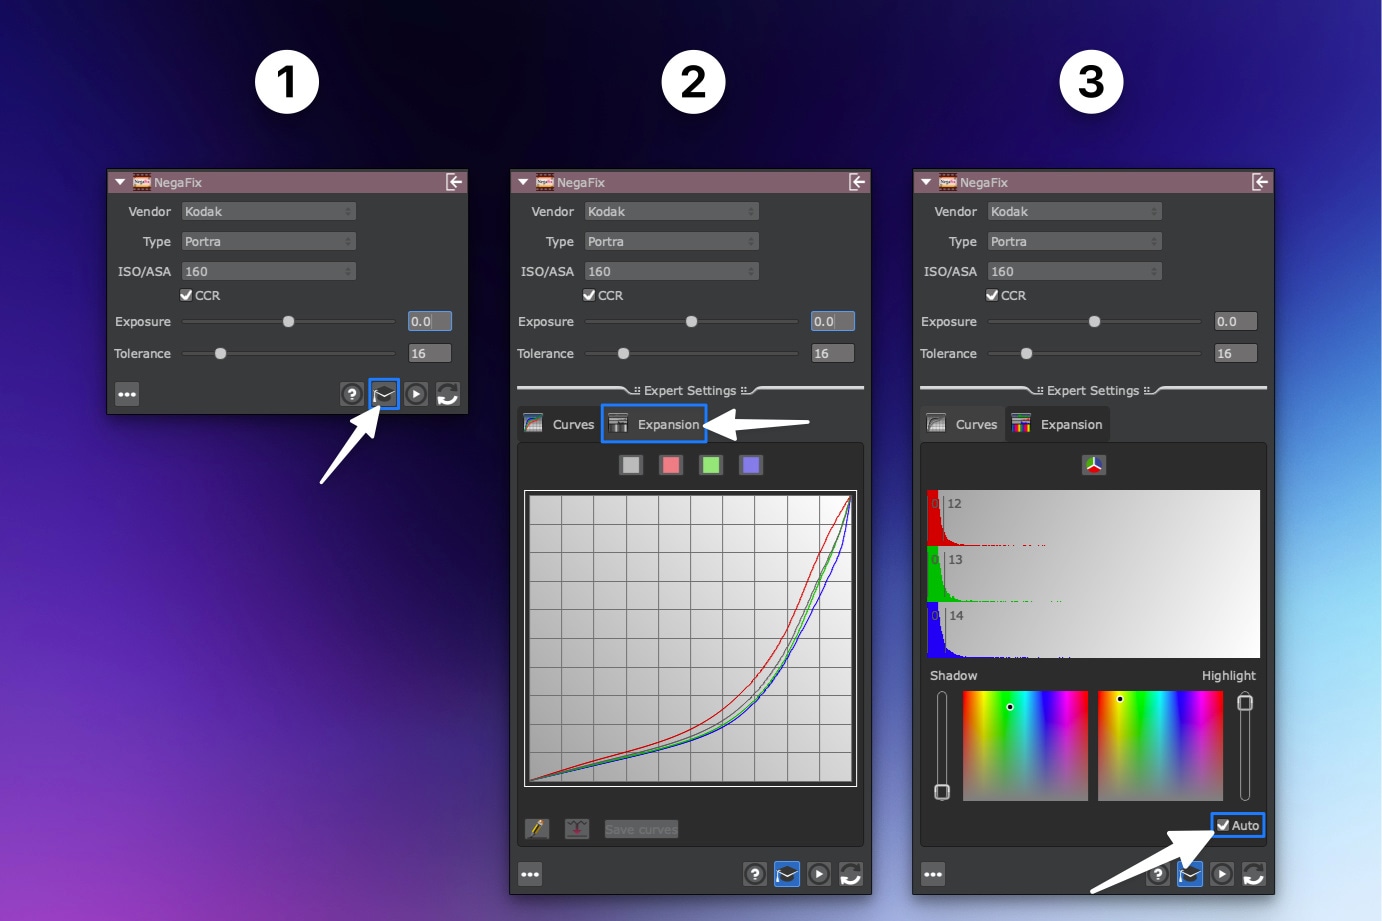
However, upon scanning a roll of film, I discovered that the colors of the final output files did not match what I had in my preview pane. They were pretty close, but not identical, which is what you’d expect from a professional tool like SilverFast. I spent a frustrating amount of time working out the issue – systematically going through each of the settings, toggling things on and off, adjusting sliders, scanning, rescanning, etc. Well, I finally figured out that the culprit is the “Automatic orange mask expansion” setting. There’s a checkbox hidden under the Expansion tab in NegaFix’s Expert Settings panel. Uncheck this box and the scan will output files with perfect colors. The annoying thing is, this ‘Auto’ setting will turn itself back on if you adjust any of the NegaFix settings – a strange and extremely annoying behavior. So, every time you change film stock, adjust exposure, or fine-tune the color cast removal, you also have to remember to uncheck the ‘Auto’ setting. Oddly enough, this doesn’t happen in SilverFast 8 (I’ve tried), just SilverFast 9.
The fact that a hidden setting like this, which turns itself back on constantly, can mess up your scans is mind boggling, and leads me to believe it’s an oversight by the SilverFast team. There’s no way to disable this behavior from what I can tell.

-
Open Expert Settings (click the graduation cap )
-
Switch to the Expansion tab
-
Uncheck the ‘Auto’ setting
