
Returning to a classic: iPod classic
Introduction
Have you ever wanted to listen a specific song on your preferred streaming platform, just to find that it has been delisted? Maybe it’s just the genres I’m into that are prone to this happening, but it happened to me again recently, and it finally gave me the motivation to do something about it.
So, I went and bought a bunch of the missing tracks from places like Bandcamp (digital) and Discogs (vinyl). I considered streaming my songs from my local NAS where I already have my music collection backed up, but that becomes a chore when dealing with bad software and slow connection speeds. I also really want to be able to bring my music with me on the go — especially on road trips or long flights. I could sync my music to my phone, but lossless audio files are huge, and I don’t want my music to compete with my photos and apps for storage space.
The next logical step was to look at getting a dedicated music player. In my mind, there was really only one option — the iPod. Specifically the chunky iPod classic with the iconic click wheel. It’s arguably the most recognized music player ever made, save for maybe the Sony Walkman (which is still in production, by the way).
I did some research and found out that you can mod these devices to increase the storage with a flash adapter, going as high as multiple terabytes 🤯. Not only that, but you can also replace the battery with ones 3-4 times the size of the original. That made the appeal even greater for me, so I bought a used iPod and ordered all the parts needed for the upgrade. Lots of iPod owners online claim the one to get is either the 5th/5.5th gen due to the DAC, or the 7th gen because of its much faster performance and all-metal body. I went with the 7th gen because I’m a sucker for build quality, and from what I gathered, the DAC didn’t make much of a difference.
Spicy pillow
Having already planned a battery upgrade, I wasn’t too worried about the state of the original battery. Still, I tried to charge it and turn it on. The original battery wouldn’t keep a charge, but I was able to power on the iPod while it was plugged in. Although, the system kept crashing just as the hard drive started to spin, resulting in a constant boot loop. After 30 minutes of this, I noticed what appeared to be a bubble underneath the LCD screen.
If you’re unfamiliar with the term spicy pillow, it refers to a battery that has gone bad and is starting to puff up like a pillow. This is what was causing the screen bubble — it’s the battery pushing the screen from under it. A battery in this condition can be dangerous, so I unplugged the charging cable and sealed the iPod in a container while I waited for my new battery to arrive.
Upgrading the iPod
The iPod classic guide by yuuiko
First of all, I cannot recommend yuuiko’s iPod guide highly enough! It’s a PDF cheat sheet that lists tons of iPod classic comparisons and part compatibility information. It will teach you how to identify which iPod you own, which is important for a successful upgrade. I followed this guide for my upgrade, and it made the process much easier as most of the guesswork was removed.
You can find it on yuuiko’s GitHub page.
Getting inside the iPod
Before prying open the iPod with metal tools, I wrapped it in masking tape to protect it from scratches or damage. My iPod was in pretty good condition, so I didn’t want to put unnecessary scratches on it.
I bought a few steel pry tools, as the consensus online is that this is the best tool for the job. I put a little bend in the end of the pry tool, which helped getting the tool inserted.


Starting from the right side, I inserted the pry tool and unlatched the clips holding it together. Then the top side, and finally the bottom side. After that, the left side came loose and the iPod was able to separate. Reading other’s experiences opening the 7th gen iPod classic, I knew it was going to be a challenge to get into this thing. But it was honestly not too bad, even on a never-before-opened device. It just took the right tool and some patience.
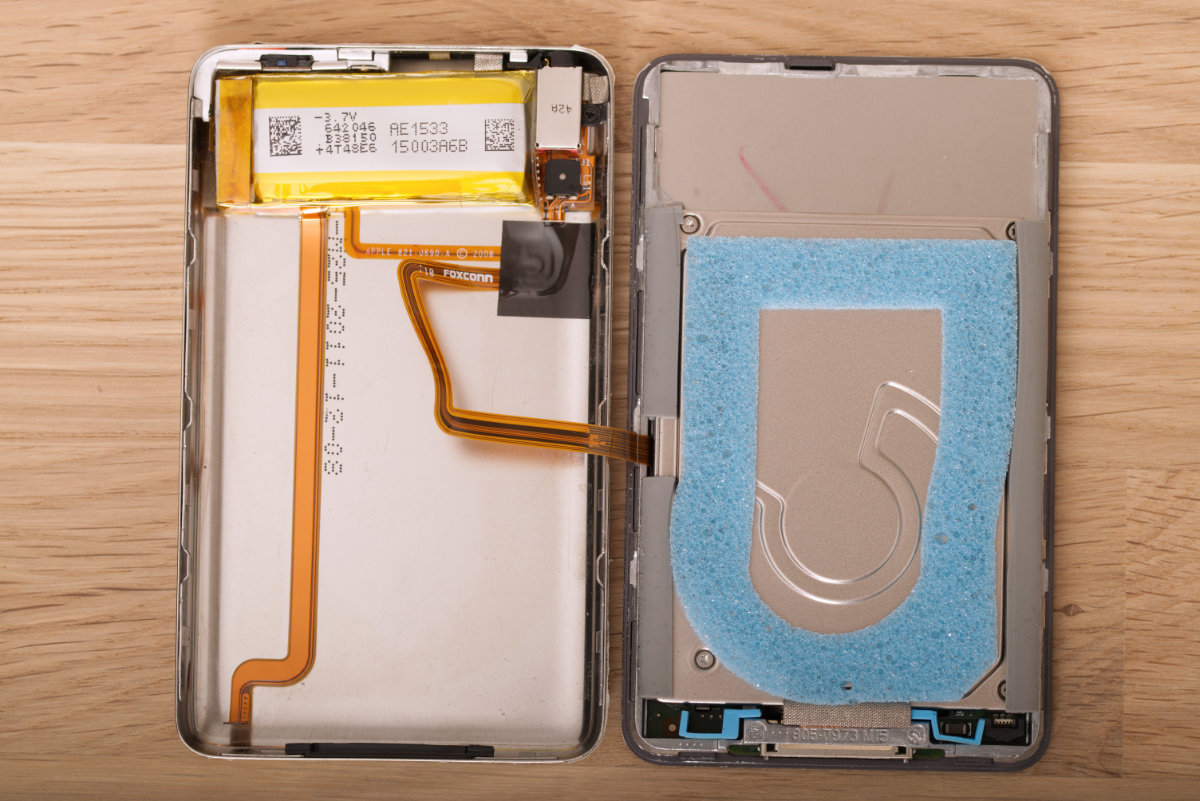
After disconnecting the battery’s ribbon cable, the iPod could be opened like a book.
Replacing the battery
The battery was glued to the metal case quite strongly, but using a spudger tool, I was able to free the battery with a bit of patience. There’s a small ribbon cable running along the under side of the battery, so while prying the battery loose, I also had to avoid causing any damage to this cable.
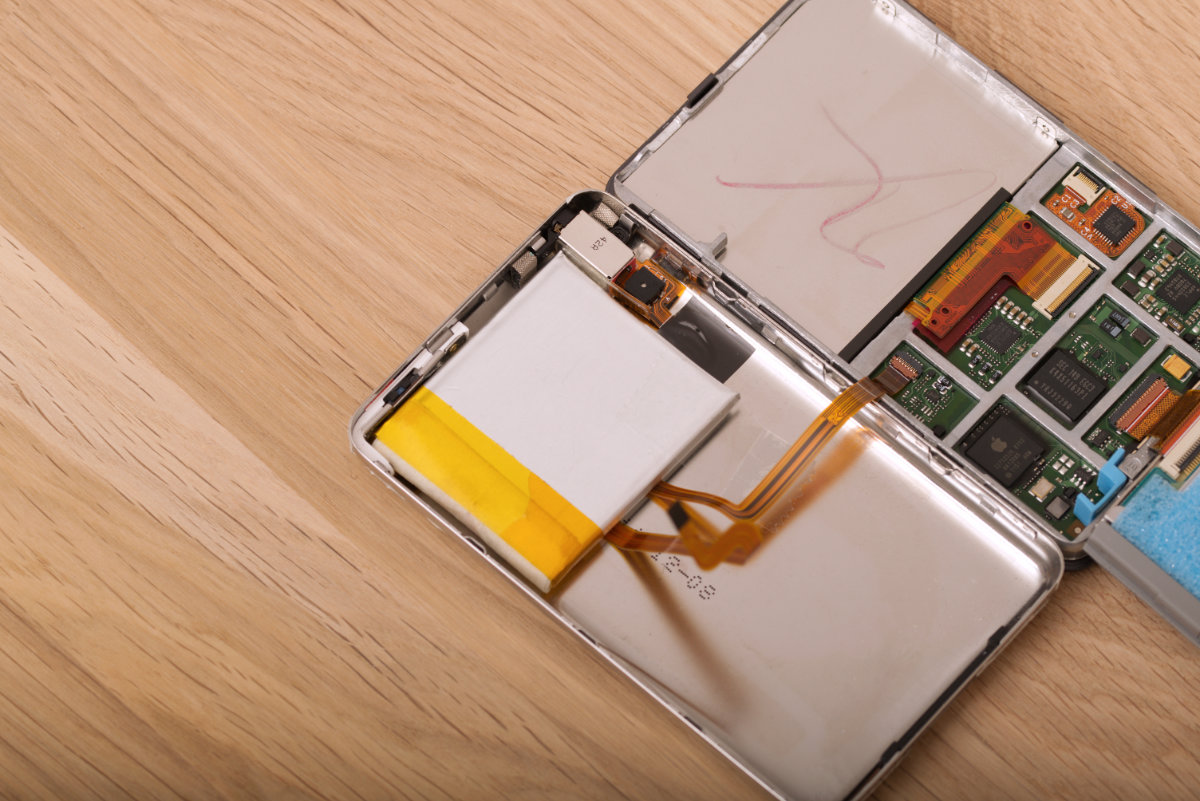
With the original battery removed, it was time to install the new battery. I bought a 2000 mAh battery that would fit the thin case. If you’re considering doing a battery upgrade to your own iPod, you should research what type of case your device has and which batteries are compatible. My new battery is roughly three times larger than the original, but paired with the flash mod, it fits nicely. The installation was dead simple… I just applied some double sided tape to the battery and stuck it to the case.
Upgrading to flash
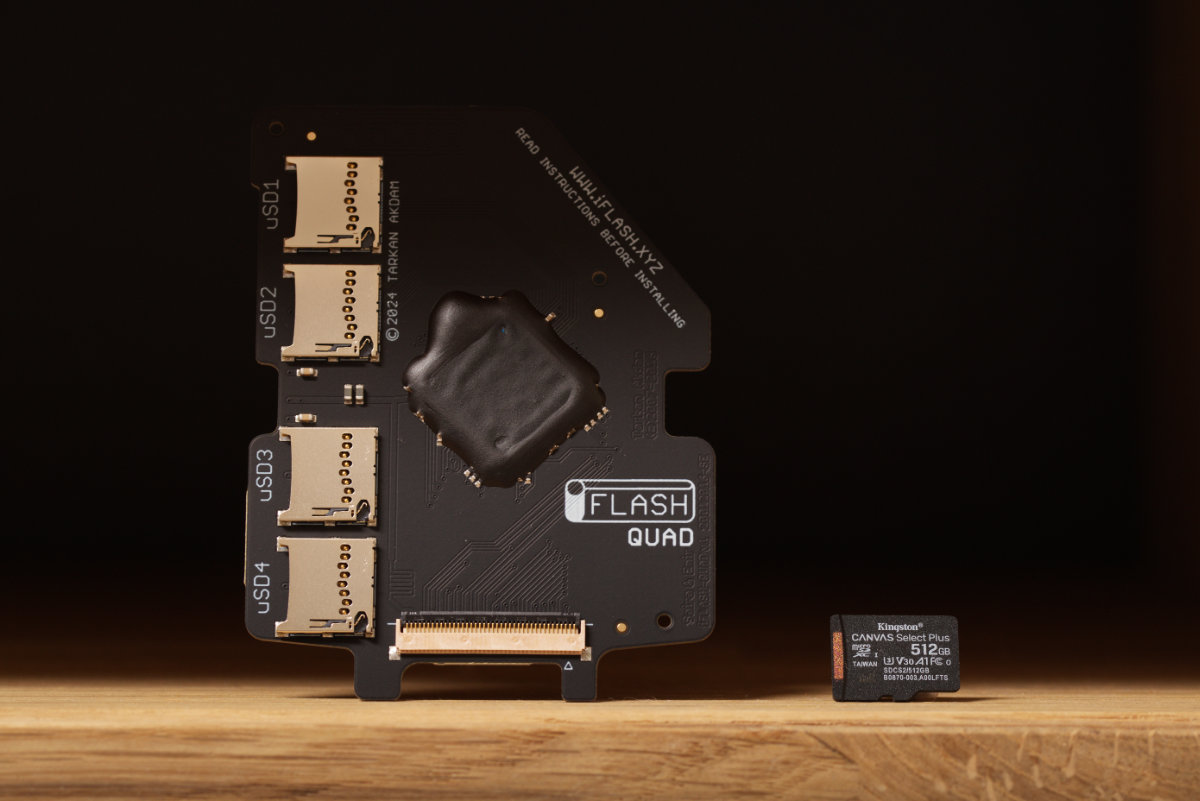
There are quite a few options out there for flash modding an iPod, but the most popular choices right now appears to be the iFlash.xyz adapters. iFlash offers multiple options, depending on your requirements. In my case, I figured out that because I have a thin case and a new large battery, I had to go with the iFlash-Quad — overkill for my storage needs (I only need 1 micro SD card), but it happens to be the thinnest of the adapters available, so it’s the only adapter that would fit my iPod.
The first step is to disconnect the original hard disk drive. Flipping over the HDD reveals the ribbon cable that connects it to the logic board. Lifting the thin black plastic part on the HDD’s side will release the lock, allowing the cable to wiggle out and disconnect from the drive.


Next up: installing the iFlash adapter. You pretty much just repeat the same steps as with the HDD, but in reverse order. The ribbon cable is quite delicate, so be patient, and don’t force anything. The cable should slide smoothly into place with equal spacing on both sides. Once that is done, lock the plastic latch in place to secure the cable to the adapter. The iFlash adapters are designed to fit neatly into place within the iPod’s frame.


That’s it! The mod is complete. Now all there is left is to reconnect the battery to the logic board, turn on the device, and pray that you didn’t mess something up. Thankfully, mine switched on without issues. And with that, I closed the iPod case firmly and was now ready to restore the software with iTunes (or just in Finder on Mac).
Restoring the iPod
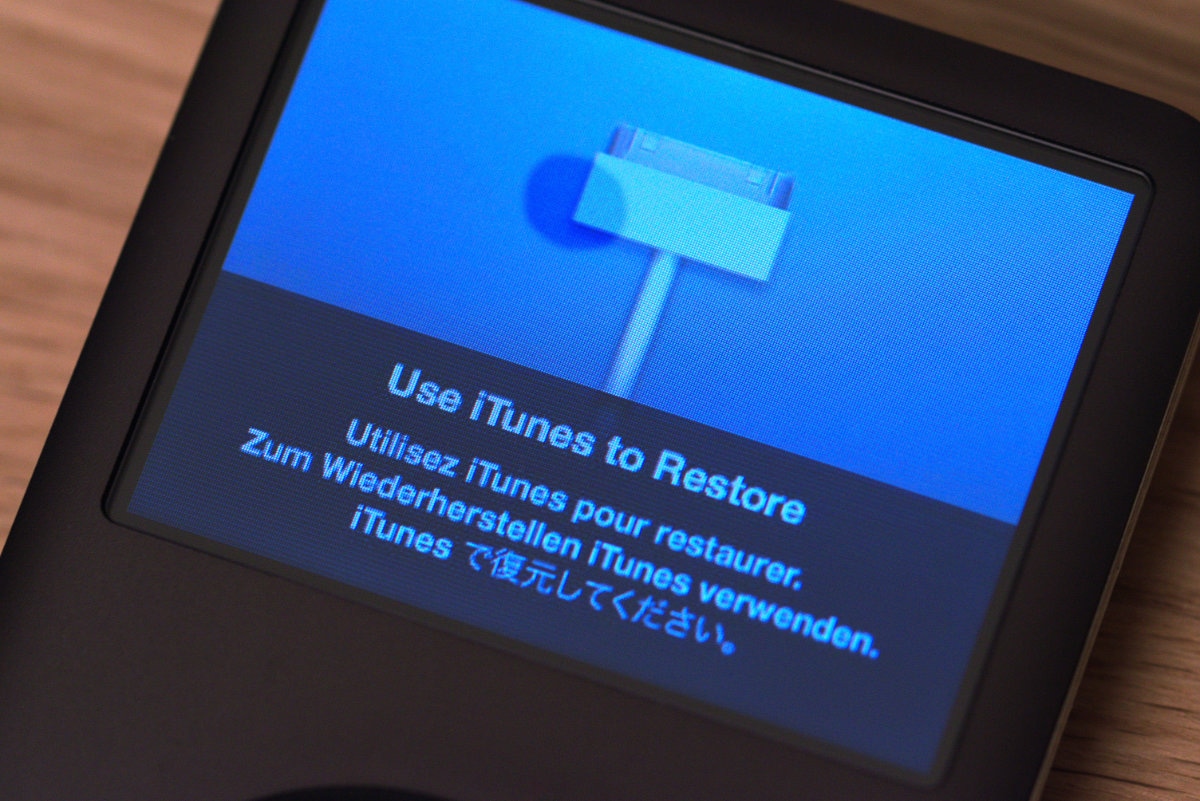
Phew, the hard part is over… right? Well, it turns out restoring the iPod is not always straight forward.
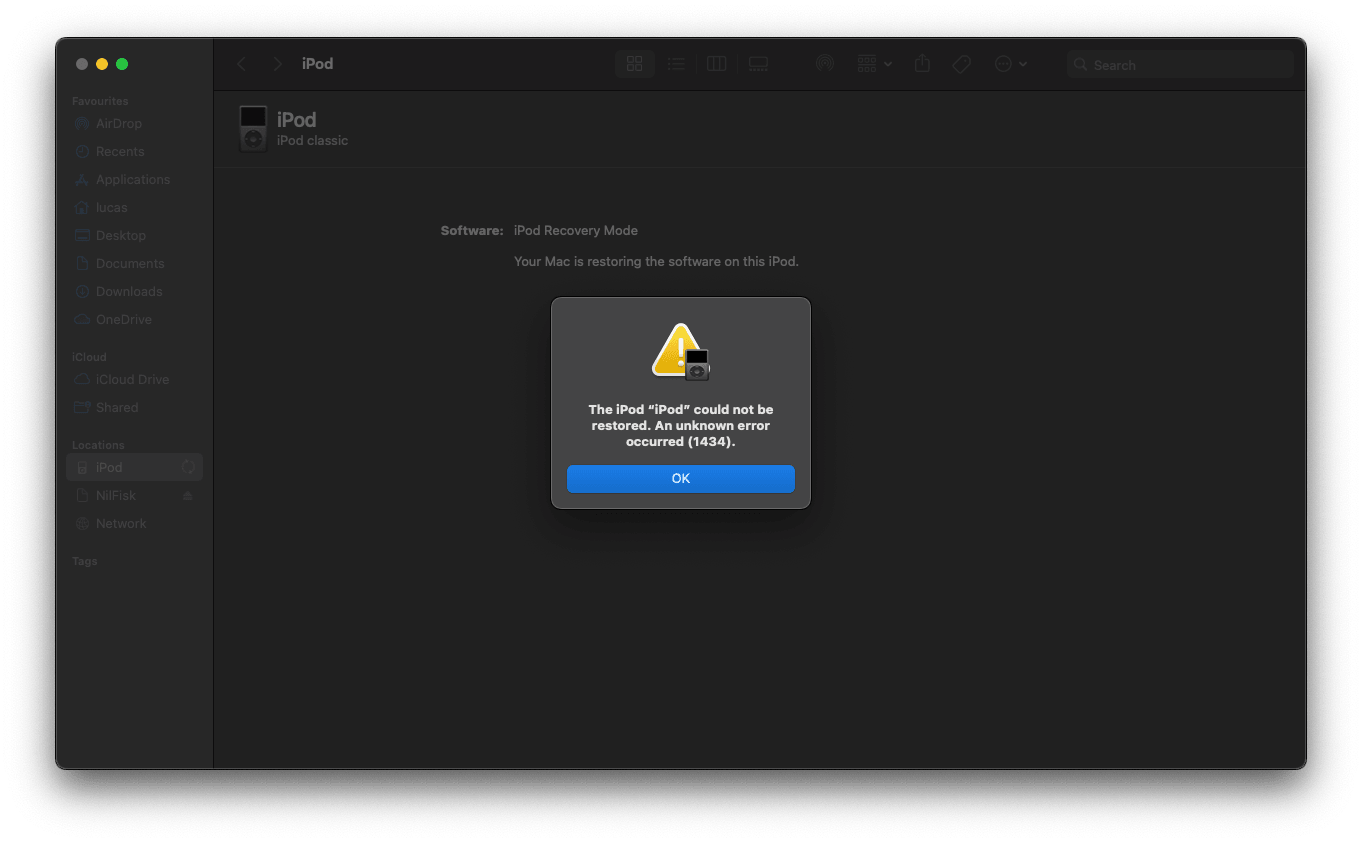
In my case, my computer recognized the iPod immediately and prompted me to restore the problematic software on it (since the SD card is empty). Following these steps seemed to go smoothly, until it didn’t. Before it could finish, I got an unwelcome error message: “The iPod "iPod" could not be restored. An unknown error occurred (1434).” Not very helpful.
Googling this error message gave me mixed results. But what I ended up doing was putting the iPod in disk mode, and formatting the SD card to FAT32, which is the file system iPods are designed for. After doing this, I reattempted the restore procedure. This time, it took much, much longer. After watching a seemingly frozen progress bar on the “restore” screen for over 45 minutes, I determined it must’ve crashed. So I disconnected the iPod from my computer and plugged it in again. To my surprise, my iPod was now fully functioning and ready to sync my music.
I can’t really explain why this happened, but the moral of the story is, if your restore process freezes for more than ~30 minutes, try reconnecting it — it may actually be fully restored and ready to go.
Syncing your music library
Syncing FLAC files
If you collect lossless music, you likely have a ton of FLAC files in your library. FLAC is a great format, but it can’t be read by iPods, unfortunately. You will need to convert your FLAC files to another format, such as MP3, WAV, or my preferred format, ALAC.
ALAC is short for Apple Lossless Audio Codec, and as the name implies, it’s a lossless format, just like FLAC. Unlike WAV, which is also a lossless format, ALAC adds lossless file compression to lower the file size dramatically. I have found that file sizes between FLAC and ALAC rival each other.
I use an app called XLD for Mac to convert my FLAC files. It’s a completely free app that can convert your audio files to many different formats, including Apple’s lossless format. XLD is not available on Windows, but I’ve read good things about MediaHuman Audio Converter, which is also free. I haven’t tested it personally, so I can’t vouch for it.
Once you have your supported audio files, simply add them to iTunes or the Apple Music app, connect your iPod, and begin syncing.
Max sample rate
One thing that I ran into while syncing my music library was this strange error message: “Some items, […], were not copied to the iPod because they cannot be played on this iPod”. Frustratingly, no further information was provided, making it difficult to debug.
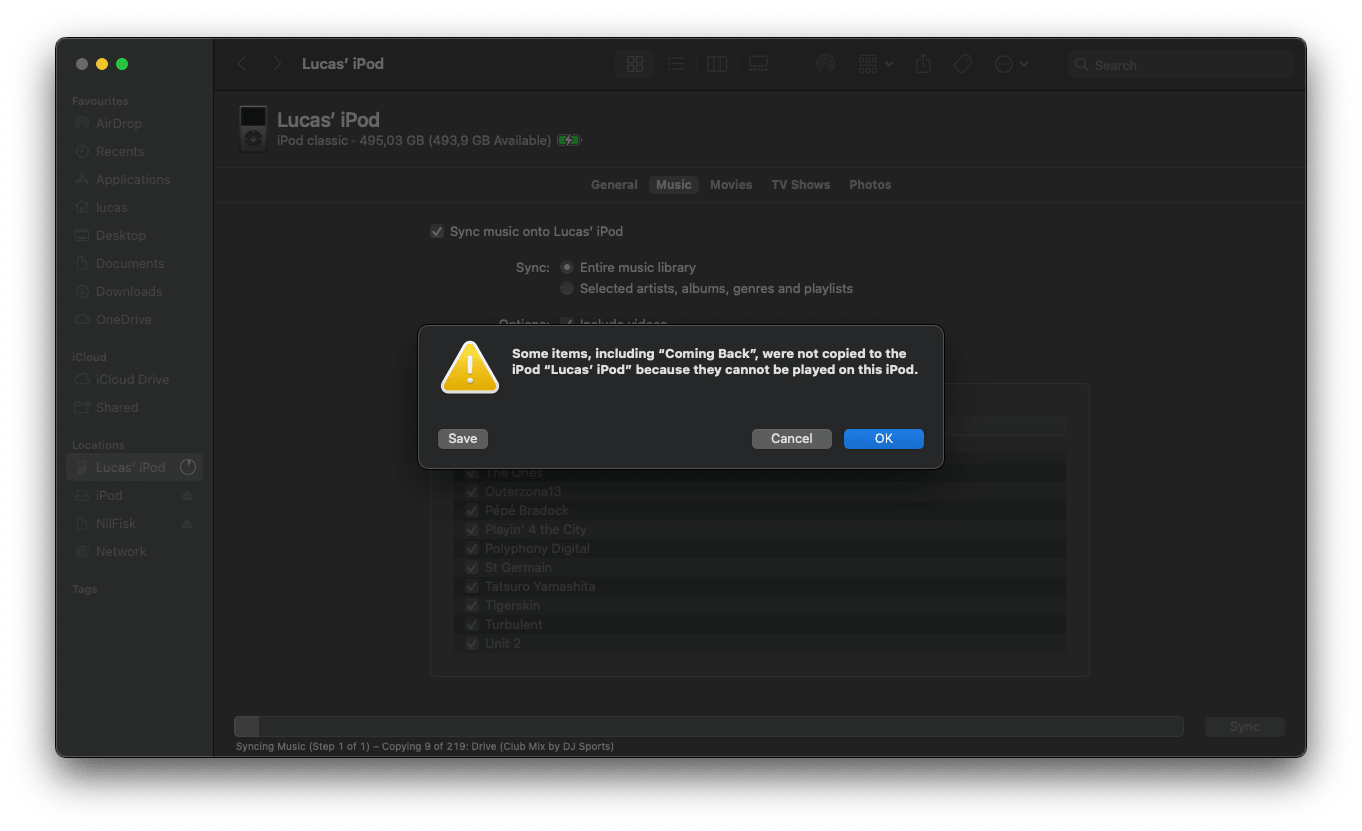
After some testing, I found that the iPod doesn’t support sample rates above 48 kHz or bit depths above 24 bit. The files that were failing were all 24-bit 96 kHz files. I converted all of the offending files to 16-bit 44.1 kHz files with XLD, and now they sync without errors. The lower bit depth and sample rate saves some space, and honestly, I can’t hear any difference.
Living with the iPod
At the time of writing this, I have lived with the iPod classic for two months. In that time, I have only had to charge it once. That’s excellent battery life if you ask me. Granted, it’s not been in constant daily use.
Hooking it up to my stereo speakers feels nostalgic. The click wheel, combined with rest of the OS, is a fun experience. I find myself using it mostly when I need to concentrate on something I’m working on. The fact that I have to walk across the room to pause the music means common distractions (looking at you, YouTube) don’t tempt me as much anymore. In that sense, requiring a wired connection is a blessing. Though, I would be lying if I said the lack of wireless didn’t annoy me sometimes.
Having the music managed locally is great. Not only do I support musicians directly and get hi-res audio files, but there are no worries that a song will suddenly disappear from my library (which happens frequently on Spotify). As for managing the songs in iTunes/Apple Music, I was surprised to learn how comprehensive Smart Playlists are. They automate playlist creation with the help of rules you set. For example, I have one playlist with rules set to only include house and electronic genres, but also exclude songs that I have given a low rating (e.g. when I have a full album, but dislike certain songs on it).


Final thoughts
So, is it worth it? Well, if you’ve researched iPod classics, you know that they’re going up in value. They’re not cheap. The parts needed for the upgrade are not cheap either. It’s an offline-only, wired media player with outdated software. HOWEVER, the iPod has soul. Its value to me is more than just what it does. It’s a classic, nostalgic, and an era-defining product that makes the experience of listening to music very satisfying. And to me, that makes it worth it.